

User manual
Introduction
My Account
My Timelines
Create and edit a timeline
Export and import
Create and edit an event or period
Vertical view
Horizontal view
Troubleshooting
Vertical view
Events and periods
The vertical view presents events and periods as a chronological sequence, allowing you to browse the timeline and consult information in a comfortable, visual way. The display order can be changed from the controls window, so items can be shown from oldest to newest or in the opposite direction.
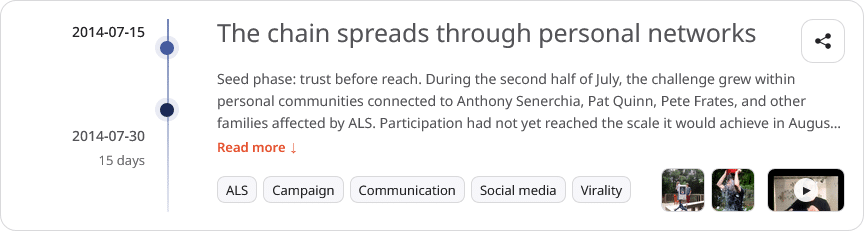
Each card shows the main information for the event or period: the start date and, in the case of periods, also the end date and its duration; the title; a fragment of the description; the associated tags; and thumbnails of related images, documents or external resources.
When an event or period contains a very long description, the vertical view shows only a fragment of the text followed by the Read more link. Clicking it expands the full content of the item.
TimeDivers is designed to work with texts of any length, so a timeline can be used both as a visual presentation tool and as a place to store extensive documentation and encyclopaedic content.
Image, document and video thumbnails are interactive. Clicking them opens the media window so you can view the content more comfortably.
Each card also includes a button to share that specific event or period. When clicked, the browser or device share panel opens; if that feature is not available, TimeDivers copies the direct event URL to the clipboard. That link can be shared with other people, published on a website or used within the description of another event to create connections between events, either within the same timeline or between different timelines.
When someone opens a direct link to an event or period, TimeDivers opens the timeline and positions the navigation on that element.
Tags and quick filters
The tags shown on each card also work as filters. When you click one of them, the timeline updates immediately to show only the events and periods that match the selected criteria. To disable a filter, simply click the corresponding tag again.
The same filters can also be managed from the Controls window, allowing you to combine several tags and build more complex searches.
Controls
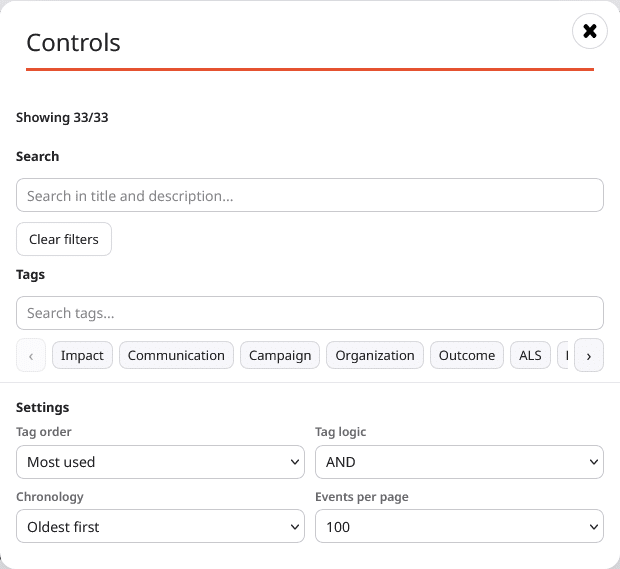
The Controls window allows you to change how information is displayed and quickly locate specific events and periods within the timeline.
At the top, TimeDivers shows how many items are currently being displayed and how many exist in total. For example, “Showing 12/33” means that twelve items match the active filters out of a total of thirty-three available.
At any time, the Clear filters button removes all active filters and returns the timeline to its initial state.
Search
The search field allows you to find words or expressions within event titles and descriptions. Results are updated automatically as you type.
Tags
The tags section allows you to search for specific tags and activate or deactivate them as filters. You can also decide how the available tags are displayed, either ordered from most used to least used or alphabetically.
Settings
The Tag logic option determines how active filters are combined. With the AND option, an event must contain all selected tags in order to be displayed. With the OR option, it only needs to contain any one of them.
The Chronology option allows you to change the timeline order to show the oldest or most recent items first, while Events per page lets you decide how many items are displayed at the same time.
Share
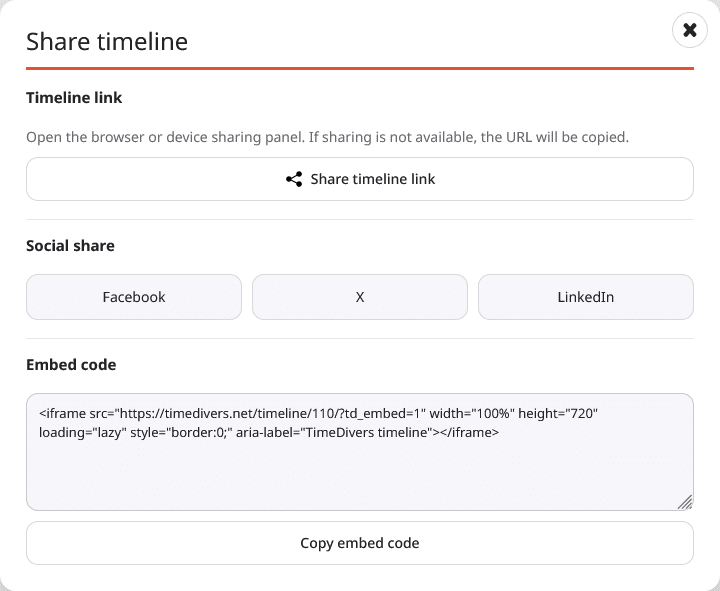
The Share window in the vertical view allows you to share the complete timeline.
From this window, you can use the browser or device share options. If that feature is not available, TimeDivers copies the timeline URL to the clipboard.
The window also provides shortcuts for sharing the timeline on social media and an option to obtain the embed code.
How to embed a timeline
To insert a timeline into another website, open the Share window and copy the embed code.
The code uses an iframe. You can paste it into a web page, blog post, virtual campus, intranet or any environment that allows HTML embedding.
The embedded timeline is fully operational: it allows users to browse events and periods, open media resources and use the options available in the embedded view.
You can customise the width and height values in the embed code.
Both parameters can be specified in pixels (px) or as a percentage (%).
A value in pixels sets an exact size. For example, width="900px" displays the timeline with a width of 900 pixels.
A value in percentage makes the timeline occupy part of the available space. For example, width="100%" makes it use the full width of the container where it has been inserted.
Although height also supports percentages, in most cases it is recommended to use a pixel value, such as height="720", because it provides more predictable behaviour across different types of websites and content management systems.
Before embedding a timeline on another website, review its visibility. Private timelines are not intended to be shared or embedded.
Export
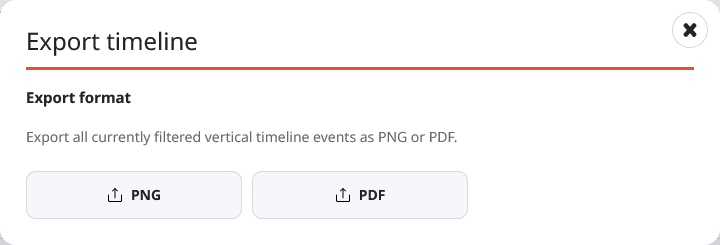
The Export option in the vertical view allows you to generate a visual output of the timeline in PNG or PDF format.
This export is not the same as the CSV or ZIP exports available on the editing page. CSV and ZIP exports are intended for working with the data of your own timeline, making copies or importing content. By contrast, the vertical view export is intended to obtain a visual representation of the content currently being consulted.
The export respects the filters that are active at that moment. If you have applied a search, filtered by tags or changed the number of displayed events, the export is generated from the events visible in the vertical view.
The PNG format generates an image of the timeline. The PDF format generates a document that can be useful for saving, printing, sending or using in presentations and reports.
Full screen
The Full screen mode hides the external elements of the page and puts the browser into full-screen mode to provide a more immersive browsing experience.
In this mode, the entire available area is dedicated to the timeline. The header buttons are not shown, but navigation through events and periods continues to work normally.
Full screen mode is designed for consulting the timeline with as few distractions as possible, especially in presentations, classes, meetings, projections or reviews of extensive chronologies.
The experience is designed for different types of device, so the display adapts to the available screen size.