

User manual
Introduction
My Account
My Timelines
Create and edit a timeline
Export and import
Create and edit an event or period
Vertical view
Horizontal view
Troubleshooting
My timelines
Usage overview
The top of My timelines page displays an overview of your account’s current usage.
This information lets you see at a glance which resources you have used and the limits available under your plan. Depending on your account configuration, the overview may include information such as the number of timelines created, the number of events, stored files or storage space used.
The overview updates automatically whenever you create, import, edit or delete content.

Create and import timelines
New timeline
The New timeline button creates an empty timeline and opens the editor so you can start working on it.
The creation and editing process is explained in detail in the Create and edit a timeline section of this manual.
Import ZIP
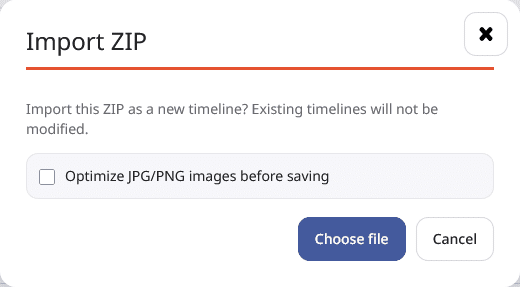
The Import ZIP button lets you create a new timeline from a ZIP file previously exported from TimeDivers.
This option creates a completely new and independent timeline.
It is important to note that this operation is not exactly the same as the Import ZIP option available within the timeline editor. Importing from the editor adds the file’s contents to the timeline currently being edited, whereas importing from My timelines creates a new timeline.
To import a ZIP file:
- Click Import ZIP.
- Decide whether you want to enable image optimization.
- Select the ZIP file you want to import.
- Wait for the upload and validation process to finish.
Image optimization reduces the file size of the JPG and PNG images included in the archive before they are stored in TimeDivers. Enabling it can help you make better use of the storage space available in your account and improve the timeline’s loading speed.
This option is particularly useful when the ZIP file contains large images or a large number of images. If you prefer to preserve the files exactly as they were in the original export, leave image optimization disabled.
If the file is valid, TimeDivers will automatically create a new timeline containing all the information included in the export.
The import may take a few seconds, especially when the file contains many images or a large number of events. If you enable image optimization, the process may take slightly longer.
If the file cannot be imported, TimeDivers will display a message explaining the cause of the error or any warnings detected during the process.
Timeline list
Below the usage overview and the main actions, you will find the list of timelines in your account.
Each timeline displays its main information and includes a set of actions for managing it.
View
Opens the timeline in its reading view so you can browse its content.
Edit
Opens the timeline editor so you can modify its information, events, files and configuration options.
The editing tools are explained in detail in the Create and edit a timeline section.
Share
Opens the available options for sharing the timeline.
For timelines that are not private, you can obtain a direct link or an embed code for using the timeline on other websites.
Export
Creates a ZIP file containing the timeline’s information and its associated resources.
This file can be used as a backup or imported later as a new timeline or integrated into an existing timeline.
Delete
Permanently deletes the timeline and its associated data.
Before deleting it, TimeDivers will ask you to confirm the action. Once deleted, the timeline cannot be recovered unless you have previously exported a copy.
